Jan 3, 2014

Happy 30th *Cut-Your-Finger-Off* Anniversary

Thirty years ago today was my due date with *Velma Candy Lewis* aka Spencer.** We had waited so long for this dearly-wanted baby.

January 3, 1984 dawned a happy day. We had Erik and Doug visiting for the holidays and both Rebekah and Rachel, our Lamanite foster daughter, were there as well. Gordon had a swing shift out at the ATC, so it was just the kids and I for dinner.

I'd read, somewhere, that you should plan on something special for your due date since you really weren't likely to have the baby on that day. In that mindset I decided that I would make a chicken dinner. Back in those days (you know, the dark ages, 30 years ago) I always got whole fryers and cut them up myself. My Daddy had provided me with a dandy set of knives AND taught me how to keep them sharp because, "You only cut yourself with a dull knife!" (Sadly, I have proven that adage WRONG!!!!!)

I pulled that chicken out of the freezer and nuked it so that it was mostly thawed out. My philosophy when I handle raw meat is: clean the sink, deal with the meat in the sink and then clean the sink again. All went well until I was making the cut through the knee joint between the leg and the thigh. Somehow my very sharp knife slipped on the somewhat thawed chicken and cut a divot right out of my left middle finger! I flopped that hunk of finger right onto the counter just like a piece of chicken. And you know what I said?

"Ack! Why did I do that!!!"


[and I love that Harley photo-bomed my finger pix]

I could see right off that this was a major problem (ya' think?) I grabbed a dishtowel and wrapped it around my finger and applied direct pressure. Hey, I knew what to do! Then I asked Rebekah to get some ice and a little tupperware cup to put the piece of my finger in to take to the doctor.  I called Kaiser to let them know I was on my way. The advice nurse assured me that I wouldn't need to bring in that tiny piece of skin so I dumped it down the newly cleaned sink! Fortunately, a friend came over to stay with my house full of kids (9, 9, 9, and 7) so I didn't have to bring them along.

I got into the examining room and the nurse there put my hand into a Betadine solution... When Dr Jones came in he rolled his eyes (wall-eyes) and asked if I had that piece of finger! I would need to take it with me to the specialist in Panorama City.

OK, so now I call home and say to Bek, "Reach in the garbage disposal and get out that piece of finger, will you?" Sadly, her little 9-year old self just couldn't bear to touch it so my friend, Ruth, reached and got it for me.

I also called Gordon at work to let him know that I would need to pick him up at work to drive me the 50 miles to Panorama City. We retrieved my missing appendage from home and went (with my labor suitcase, just in case) to see Yuseff Yuseff, who put Humpty-Dumpty my finger back together again with 13 stitches.

And you know what? That considerate little baby Spencer waited until my finger was completely healed before he made his appearance!

THREE WEEKS OVERDUE

** (Early in my pregnancy little 9-year old Rebekah had a dream that we had a little red-haired girl named Velma Candy Lewis. So I was pregnant with Velma but had Spencer! Remember these are the days before regular ultrasounds!)

Jan 2, 2014

Saving Up Sunshine

I walked out to deliver a singing birthday card to one of our little Primary kids in just my long-sleeved shirt. Ah, I do love this 40° day! This is one of those bright cerulean blue sky days! I just love this wonderful shade of blue! Even though Salt Lake City is in the midst of an inversion-yuck day we sit high enough here on the Springville bench to be out of most of it.

On my return I noticed all of the beautiful things all framed by that gorgeous sky. I fetched my Rebel (which has been languishing in its camera bag for way too long!) and went back out and retraced my steps to capture some sunny-sky days.

The thought occurred to me, "Wouldn't it be nice to be able to store up some of this sunshine and blue sky for one of those bleak, dark days that I know will be coming?"


Fortunately we can do that! We can save up our happy thoughts and faith-filled moments for those dark, discouraging days that come to all of us.

Then we can "repair our nest" and be good as new again.


So that's what I'm doing here, on my blog; filling up my pockets with happy thoughts and sunshiny days.

Jan 1, 2014

My Darling Niece

My darling niece is a writer AND she is going to be published! As part of that process she needed a bio photo for her book. She asked if I would be willing to be her photographer. Sure thing!

She was traveling home today after spending the holidays with her folks so we set up a photo shoot right here in my little corner of paradise. (I'm so glad the Eves share their beautiful pond- all the way from the Philippines! Although their nephew looked a little confused today!)

As I was clicking photos I was impressed, again, with family!

MY FAMILY! 

Many times I have this experience as I look through the viewfinder! I'm taking Sarah's photo, but who I see in those eyes, cheeks or smile is my Mama! (or my Daddy) It is déjà vu!


[isn't she the cutest?]

The first time I experienced it was almost 16 years ago when my niece Cindy got married. There she was, at Grammy's temple, looking like her Grammy AND with her Grammy's wedding rings.


I'm so grateful for the eternal nature of the family. That these wonderful people who are my family will continue to be MY FAMILY!

I've missed posting to my blog on a daily basis! I love having this very real and pertinent record of what I do and see. So project twenty-fourteen is under way. It is for me and if you folks like to read over my shoulder you are certainly welcome to.

Dec 19, 2013

A New Tradition!

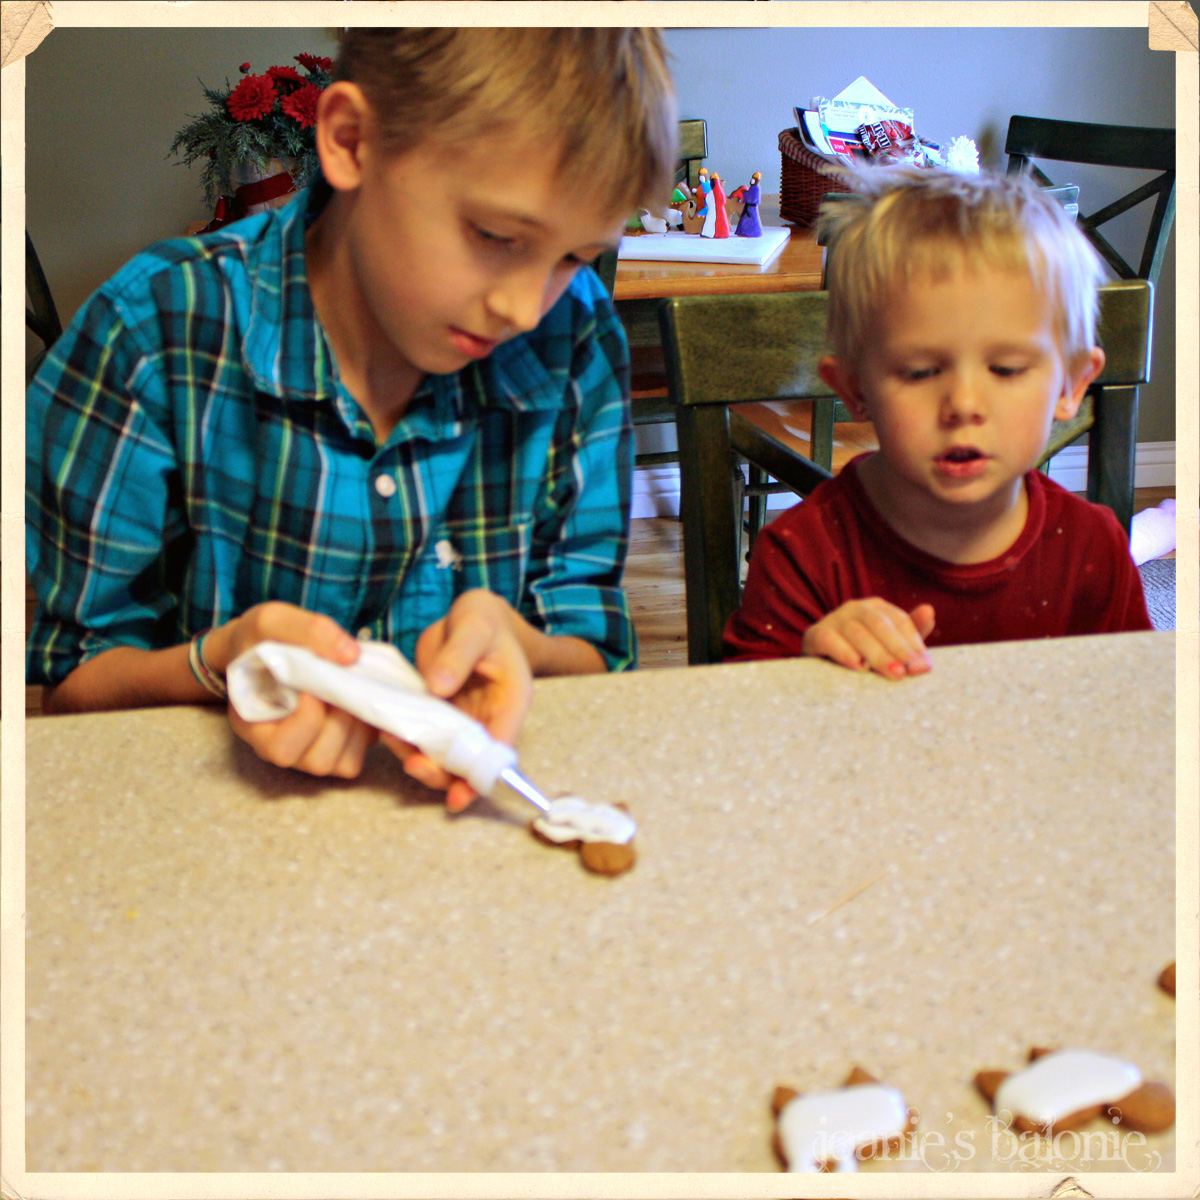
Last week while I was making my gingerbread nativity the thought kept rolling around in my head, "Wouldn't this be an awesome activity with the grandkids?" I knew that the kids needed to be old enough to actually participate so that ruled out the littles. (As it turned out, Jude came to hang in the highchair and eat copious amounts of fruit and beans while Mama went to see if she could get her 2-week migraine under control)

(You know what I love the most about this photo? Yup, that family sign that proclaims- THIS is my family!)

I knew that I needed to have the gingerbread baked and ready when the kids got here to keep this from being an all day affair. My plan was to have the icing ready too... but it wasn't so I had some champion frosting tinters on the job.


Once the frosting was tinted it was time to start decorating. I love how self-sufficient and creative these kids are. I gave them some general instruction and a demonstration and they were good to go.


Well, all except Sophie. It's hard when you have tiny hands.

(I just love her pixie hair!)

I told them about my black sheep and explained how the Savior's atonement cleanses us from all our sins when we repent. I'm so grateful that I can share my testimony with my grandchildren.


When it was time to go home Christian stayed for one last photo op!

(I do love this boy!)

Now can I just say a couple of things?
(Yes, yes I can! This IS MY blog after all!)

I am one of those lucky women who got to live my dream. As a child, when I was asked what I wanted to be when I grew up, my answer was, "I want to be a Mommie, just like my Mommie!" I wasn't always able to be a stay-at-home-Mommie (just like my Mommie) but I got to love and enjoy my children. It is the hardest and most fulfilling job I've ever had.

But you know what? This being a Grammie is perhaps even more satisfying. (I am the Grammie-spoiler NOT the Mommie-enforcer) I recognize just how blessed I am that I can be a part of these darling children's lives!

I'm in hopes that next year I will be able to include more of our grandchildren. I do love this new tradition!

Dec 15, 2013

Ris'n With Healing in His Wings

Church today can only be described as a spiritual feast. It was the most wonderful blend of words, music, testimony, thoughts and hymns.

It all came together singing the closing hymn- Hark! The Herald Angels Sing. When we got to the words of the second verse,

"Ris'n with healing in His wings."
 
it was all I could do to not sob. Because that is what I pray for, not only at Christmas time, but all year long.


I've talked a lot here about grieving and healing. I'm so grateful to be at this end of that path. I've experienced so much healing in the nine years since we moved to Utah.

As I contemplate other's journey on this difficult path it is always my foremost prayer that they will feel the loving arms of our Savior encircling, protecting and pouring in that healing balm of Gilead.

I bear fervent testimony that Jesus Christ is the Savior of the world. He came as a tiny baby, lived a perfect life and then willingly accepted all of the sins, pain AND grief of His brothers and sisters. He willingly descended below it all so that He would know how to succor His people. He loves us with an infinite love... I can't really comprehend it; but I feel it deep in my soul. I know that my Savior loves me. I know that He delights to bless me. I know that our prayers on behalf of others can call down the powers of Heaven to heal and comfort them.

How grateful I am for that healing...

Dec 12, 2013

Gingerbread Nativity

Our Ward Christmas party is tonight. The theme is an old-fashioned Christmas. Several weeks ago they sent around a sign-up at church asking for the obligatory *funeral potatoes* or dessert AND something new... a gingerbread house to be used as a table centerpiece. I thought, "I can do that!"

Now I don't remember what came first: the sign up OR seeing a gingerbread nativity on Pinterest. But as soon as I saw the nativity I knew that is what I wanted to do. My first thought was to make a gingerbread stable and then use the little figurines from my Playskool nativity (and trust me I didn't pay what Amazon wants when I bought mine years ago). Then I saw a set of nativity cookie cutters (again, on Pinterest) They were so cute and... HOW HARD COULD IT BE?

(Are you ready to be amused?)

The cookie cutter set arrived late Tuesday so first thing Wednesday (yesterday) morning I contacted a Facebook friend to get her recipe for royal icing (the kind that flows and then dries hard and shiny). She generously shared her recipe and tips with me. I'm so grateful for that. I took my shopping list to Wal-mart to get the things I needed, came home, made and baked the gingerbread piece (my house smells so good!). I was aware, while shopping, that I was having some minimal-brain-disfunction, but that isn't a new occurrence for me.

While the gingerbread pieces cooled I mixed up the frosting. I decided that the first thing to do was ice the two triangle stable pieces and cover then with Wal-mart brand shredded wheat so it looked thatched and set them aside to dry. Now onto the figures. I had a few problems with the learning curve working with the royal icing, but finally figured it out. I'm sure it didn't help that I only have two small tips.

After the stable pieces were dry I decided to put them together, with royal icing, just like the instructions say. Ummmm, problem- the ginormous triangle cookie cutter is not a perfect triangle, but a triangle with convex sides so there was only about one inch of contact along the side.

OK, DESIGN CHANGE- get out the serrated-edge knife and saw them straight. Now how do I get it to stand up while the icing SLOWLY dries? I ended up propping it up with some canning jars and went back to the little figures.

Hours later I carefully pick up the stable and the icing-glue immediately breaks! I'm sure it doesn't help that the frosting and shredded-wheat cover walls now weigh approximately 40 lbs!!!

DESIGN CHANGE (again)- Maybe someone else could have made this work, but after fooling around with this for the better part of 6 hours already I WAS NOT THAT PERSON! I reverted to my original two-walls-with-a-flat-roof idea. I got out my saw serrated edge knife again. Ahh, much better.

Even with the design change the royal icing wouldn't hold things together and by now I've realized that this gingerbread nativity was never going to be eaten... Bring on the glue gun! (I think that if I'd used the glue gun with the triangle pieces it may have worked)


When I was doing the last of the decorating, after Primary presidency meeting last night, I mixed up some black frosting for the the sheep's legs, noses and ears. That is when I had the idea to make a all black sheep. My mind started to roll that black-sheep idea around and I knew that little black-sheep had to be closest to baby Jesus, the redeemer of the world.


Because when it is all said and done aren't we all black-sheep in need of our Savior's atonement?

Nov 27, 2013

Noel Sign and Barnwood Christmas Trees Tutorial

My very crafty friend, Breanne, recently posted her darling Noel sign and wood Christmas trees on Facebook and offered to host a craft day to make them. I was so impressed with my finished products that I asked her if I could write up a tutorial for these cute porch decorations!


Sadly, I don't have any *in the making photos* to share (it was freezy-cold that day!) but I think with the directions and a few illustrations you can figure it out.

Noel Sign
Materials needed-
• 3- 4 foot x 1x4” boards (I got the good grade at Home Depot and didn’t have to do any sanding)
• 3- 9-10” x 1x2” boards
• Letters N O E L cut from Contact paper using a Cricut machine. Mine are about 8" wide (I suppose you could print letters on a computer, trace them on the Contact paper and hand cut)
• White acrylic paint (Keep in mind that you can buy the 4oz size of *trial* paint and have them custom mix your colors. I used the Behr paint and primer in one for this since I already had it)
• Red acrylic paint (I ended up using some old craft acrylic paint I had on hand. It needed two coats and I used the better part of 3- 4oz bottles)
• Staples and air compressor stapler OR other fasteners- screws etc
• Wood glue
• Paint stirrers (to be used as spacers)

Clamp all three 1”x4” boards together and trim the ends flush, only taking off a small amount so your boards are all even.

Place boards; face down, on a table or other flat surface. Make sure that the ends are all even. Use paint stirrers as spacers between the boards. Place one of the 1” x 2” x 9-10” boards horizontally. Adjust to fit the width of your sign. (My finished sign, with spaces, measured 10.5”). Spread a small line of wood glue under the cross-wise 1x2”, then staple support to back of sign with several staples. Repeat for remaining supports.

Paint the front, top and sides of the sign white. Allow paint to dry for several hours. (I have to go do something else or I get too impatient!)

Before peeling the back off of your contact paper do some preliminary spacing of the letters. When you are satisfied, remove the back and stick them to the sign.

Now here is the *Auntie P Trick*... with only a small amount of white paint on your brush, paint around the edges of the contact paper. The white paint will seep under the edges of the contact paper where it hasn’t adhered to the sign and prevent the RED paint from bleeding under. Ha! She is a genius! (You can use this trick anywhere with painter’s tape too!). Let the paint dry. (Step away from the sign!)

Now paint the front, sides and top with red paint. It may take two coats depending on your type of paint.

When dry carefully peel off the contact paper and viola! White letters on a red sign!


Barnwood Christmas Trees

Materials needed-
• Old weathered wood or pallets- any width (mine are 1x4”)
• Staples and air compressor staple gun OR other fasteners, screw, etc
• Wood glue
• The ability to cut 45° angle with a compound miter saw, or a miter box and hand saw, or cut them free-hand using a saw (that might add to the charm)

Choose a board for the upright (trunk**) part of your Christmas tree that will be as tall as you would like (as you can see, I did two different sizes)

Cut the top piece (branch) of the tree by making two 45° angle cuts to form a triangle. Flip the board vertically to make the second cut.

Measure the bottom of the triangle. Subtract 2” from that number. That will be the length of the top of second branch.

The length of the top of the NEXT branch will always be 2” shorter than the bottom of the PREVIOUS branch.

Continue cutting, remembering to flip the board vertically until you have as many branches as desired.

Starting with the top piece run a bead of wood glue on the *trunk* under that branch, then staple in place. I used a paint stirrer to get the spacing even between branches. When you’ve finished attaching of all your branches leave your tree flat until the glue has dried or it will run.

** With my first tree I didn’t cut the top of the trunk to form a triangle and since my wood is old and brittle the top piece split :(. On the smaller tree I cut the top of the trunk to give the whole piece support)


Vivian's Pincushion

If I had to make a guess I would tell you that Vivian Naseath gave me this pincushion as a bridal shower gift 43 years ago. That makes this cute little guy a long-time sewing friend.

I have several pincushions/magnetic pin holders; each with its own special purpose. Call me silly (and I am), I like to segregate my pins and needles. These particular cute, flat-headed pins are just the pip when I want to do applique or foundation piecing.

As I was sticking pins back into the pincushion last night I had a flood of memories about the sweet maker of this old friend.


Vivian and George Naseath were our neighbors and friends my whole growing up in Greenville. They were Stake missionaries and introduced the Gospel of Jesus Christ to my parents shortly before I was born. That is a gift much greater than this simple little memento of love.

When Vivian crocheted this so many years ago she glued the little circles to a piece of cardboard, which has long since disintegrated. Earlier this year I washed the little crochet rings and when I stated this sewing project (an Under the Sea quilt for baby Annabelle, Spencer and Deborah's baby due in January), I found a nice piece of rigid plastic and re-glued the circle. Now it is ready for another 43 years of happy pin holding!


Vivian and Joanie 1953 in Westwood, CA

Nov 23, 2013

Don't Judge Me...

Let's start with the fact that I ascribe to the adage,

Housework makes you ugly!

Then we will continue with the fact that the top of my pantry is 97.5" (over 8 feet) tall and I am only 63" tall AND I'm not 30 anymore!

So the top of my pantry doesn't get cleaned too very often. But today was the day! Luckily I have a little canister vacuum with a shoulder strap just made for jobs like this.


When we first moved to our house almost nine years ago I bought some beautiful house plants at Home Depot to go up on top! I quickly realized that I DID NOT want to drag the ladder into the house once a week to water them. So I returned them and got silk plants.

Yup this is the view from the tippy-tippy-top of my ladder. You know the place... it says don't stand on this or you will die!


Since I'm not 30 anymore I would rather be on the firm foundation of my knees *up on top* than balanced on the rung of death!


Gordon fetched and carried all of the things I needed:
  • damp micro fiber cloth (OMSH was it dirty)
  • spray cleaner
  • vacuum
  • hold the ladder
  • is this even?
  • is there still dust on the plants?
  • I don't care if there is still dust on the plants!

Of course, I decided to do the AFTER I'd already swept the floor. Note to self: Next time do the top first and then the floor...

And by the time I was finished I'd had at least 2 hot flashes and my hair had melted flat to my head...


See! Housework makes you ugly!

Nov 18, 2013

THIS- This is What I'm Thankful For...

Our family tradition is to have our Thanksgiving Feast on the 3rd Sunday in November. This year it makes our Thanksgiving *very* early... but there was no complaining! In fact, there were groans of stuffed-satisfaction and compliments on this feast.

For me these types about of holidays are ALL ABOUT FAMILY! I would rather have all of my local family on ANY DAY rather than half of them or families that are stressed out about seeing everyone and eating numerous Thanksgiving dinners on the same day.

Camille and family came down early to help make our signature Orange Rolls! Oh my! These are so yummy- and my family has grown up eating them.

I told Camille, "Don't let me forget to get a family photo before everyone leaves!!


The only sad part about this photo is that some of our family is too far away to join us... maybe someday.